Thursday, December 17, 2009

License plate bracket

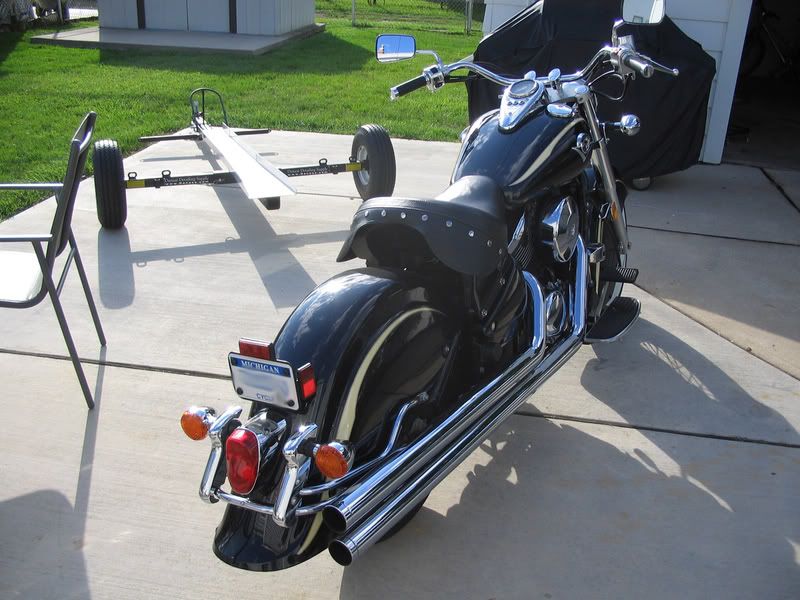
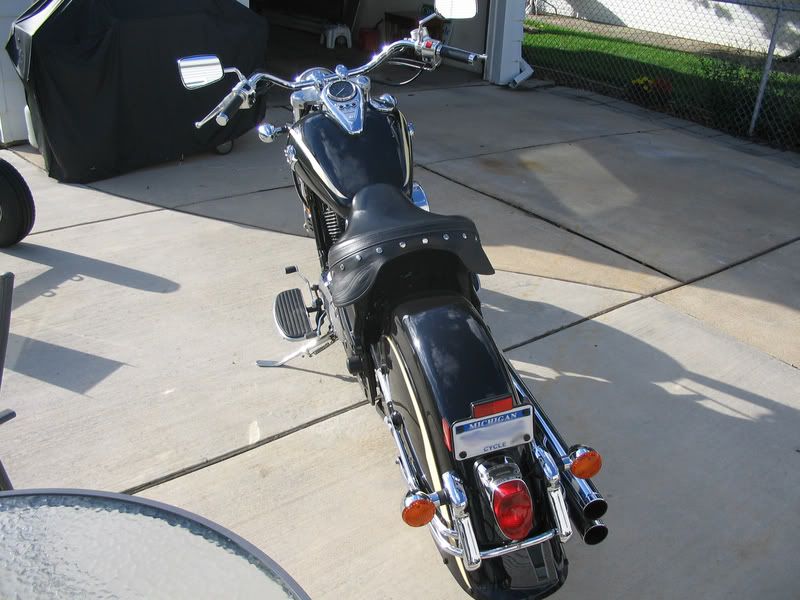
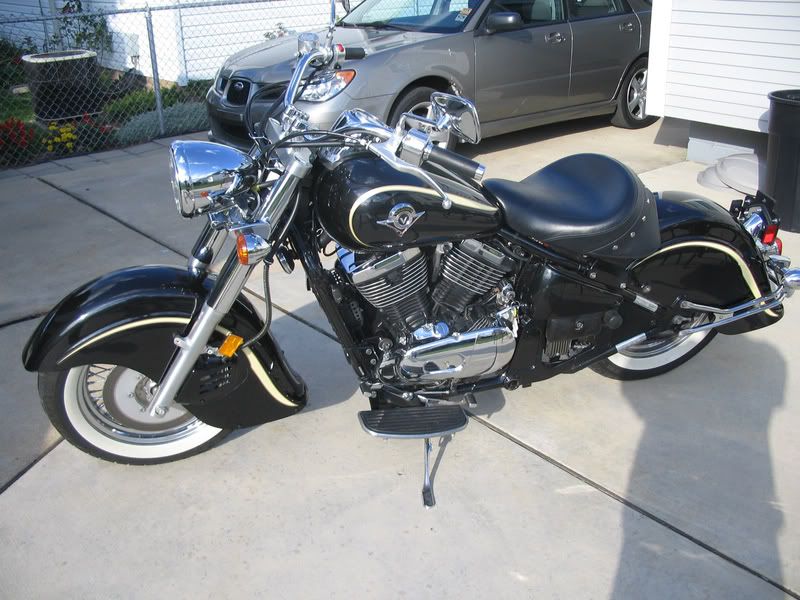
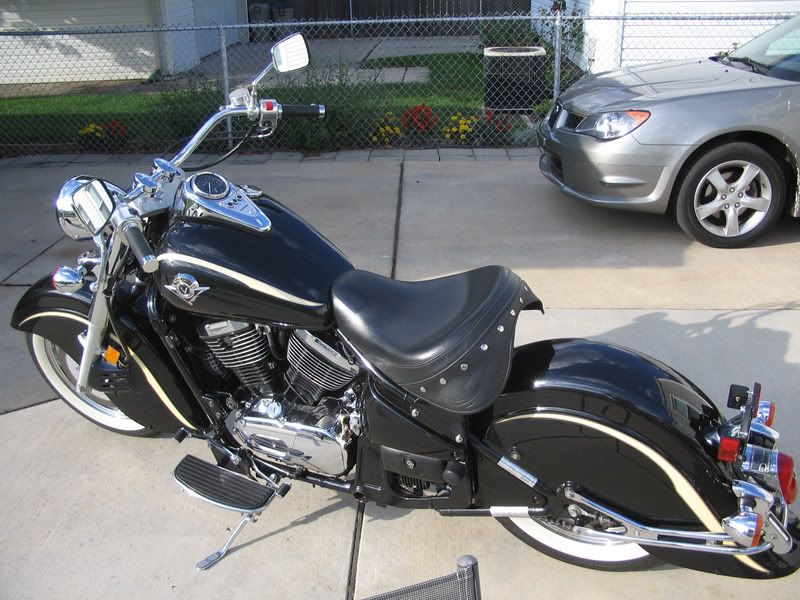
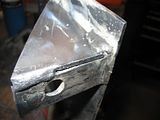
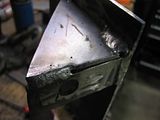
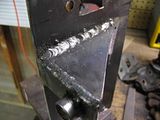
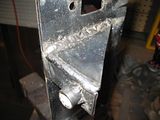
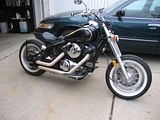
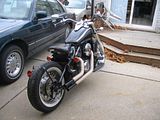
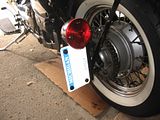
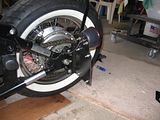
Here are some of my new welds with my Hobart 125EZ.  It's for a license plate / brake light bracket for my Vulcan.


Photobucket
Photobucket
Photobucket
Photobucket

Monday, November 23, 2009

Hobart Handler 125 EZ Review

I got my 125 EZ Friday night. I must say, I love this machine. It's been about 14 years since I've welded, if not longer and I'm picking it back up pretty well. My dad is a welder for a living and he came over to get me going and he was really impressed with it too. It didn't do 22 gauge too well, blew right threw it for the most part, but it did 16 gauge to 3/16" really well. I ran a small bead on some 3/16" I had and tried to break the weld by putting it in the vise and smashing it with a hammer and it would not budge. I also welded some motorcycle exhaust together, it came out really bad looking but it would not bust apart. I just need more practice welding on curves / pipes I think.

Thursday, November 5, 2009

Are all HD riders fags?

According to Southpark they are:
http://www.southparkstudios.com/episodes/251889/

Monday, November 2, 2009

Exhaust is completed

Here is the exhaust on the bike.  I'll try and get some video this weekend.  We ran the exhaust without any baffles and then installed these 4" baffles I got from JC Whitney.  Without the baffles the bike sounded really mean and really loud, however it popped some.  After installing the baffles the bike got a tad bit quieter but sounds mean still.  I'm really pleased with how it all came out, looks and sound.

As you can see I've also removed the emblems from the tank.  It looks so much cleaner now.


Photobucket
Photobucket

Thursday, October 29, 2009

Pipes

Got the pipes back from sandblasting and got them primered and painted in Dupli-Color Engine Paint.  I ended up going with semi-gloss black.  They came out really nice.  All the new hardware is in as well so this weekend I plan on getting the pipes wrapped in heat wrap and on the bike.  I'll try and get pics tonight.

Sunday, October 25, 2009

Friday, October 23, 2009

Fender and Exhaust

Got the new fender in.  I ended up with the Blue Collar Bobber fender kit.  Was more than I wanted to pay but it's direct bolt on and looks the best I think.  I was a little worried about it being fiberglass but it's really thick and rigid.  I'm happy with it.  I got it test fitted and everything and now just need to wait until I can get it to my buddy Todd for paint.  He's going to paint it the OEM color that's on the tank.

I cut the chrome off the exhaust this week.  The exhaust looked all chrome but it was just one long heat shield basically.  So now I'm left with 2 rusty pipes.  This weekend I'm cutting the pipes down to the size I like, thinking of cutting them on an angle but not sure yet.  Then I'm going to have them sand blasted.  after sand blasting I'm goign to paint t
Publish Post
hem with high temp black paint and wrap them in black heat wrap so just the ends are exposed.  I'm also going to try and find some removable baffles so that I can quiet it down when I want.

I'll try and get updated pictures this week / weekend.

Monday, October 19, 2009

License plate / brake light bracket

Here is the license plate / brake light bracket I made. Just used 16 gauge flat steel and bent and cut on it. Painted it gloss black and bolted it up. The light is a simple trailer light that acts as a daytime running light as well. I've been told that I'd need a gusset or it could eventually break. I'll keep my eye on it next spring and see how it holds up.


Photobucket
Photobucket

Monday, October 12, 2009

Fender

I've been heading toward the direction of doing a 6" flat fender from a fender blank and having it painted to match the bike. But the more I think about it and the more flat fenders I see on Vulcans I think I'm going to bite the bullet and just get the bolt on fiberlgass rear fender kit from Blue Collar Bobbers. That way I don't have to worry about not being happy with it after it's all been painted and done.

Friday, October 9, 2009

Blue Collar Bobbers

I have to give HUGE props to BlueCollarBobbers.com ! i emailed them to tell them that the kit did not fit the Drifter. I got it to fit with some work and could not use two of the parts but it was just not direct bolt on. I just wanted to let them know in case another Drifter guy came through. They gave me a $50 credit because of it and told me don't worry about sending the other parts back! I'm not going to do that though. I'm going to send them the parts I could not use back so they can use them and toss in some of the products I make in too to show my appreciation.

Thursday, October 8, 2009

New seat

Ordered a Vulcan seat kit from Blue Collar Bobbers . The quality of their kit is awesome but the Drifter is different from a standard Vulcan so I had to do some cutting and stuff. Also you can see how I relocated the stock turn signals.

Photobucket Photobucket Photobucket

Sunday, October 4, 2009

Bobber Project

Here are some pics as the bike is right now:


Photobucket


Photobucket


Photobucket


Photobucket


Photobucket


Bobber Project

Here are some pics as the bike is right now:


Photobucket
Photobucket
Photobucket
Photobucket
Photobucket

Bobber Project

Well I've got the rear fender off my Kawasaki Vulcan Drifter and I'm officially done riding for the year. I sold my stock seat within an hour on eBay and will be ordering a LaRosa seat for it this week, if not tonight. Since I'm doing this project on the cheap I did not want to go out and spend $100+ on some tail light and license plate relocate bracket. So what I decided to do is buy a round 4" trailer light with the clear window to light up a license plate. For the bracket I'll attempt to make one myself with a sheet of steel. I don't want to be one of those riders that thinks the more money you dump on parts the better they will be or the better the bike will be. I'n my opinion there is no need for a $100+ steel bracket with a Chinese made brake light when you can get the same thing at the trailer store for $5.00 and make a bracket the cost of a piece of sheet metal.
I'll try and get pics of the bike as it sits now up this week.

Monday, September 28, 2009

Grip Tuning Body Kits in our eBay Store!

We are now selling Grip Tuning Body Kits!
http://stores.shop.ebay.com/Daniels-Customs__W0QQ_armrsZ1

Clean Your Interior Before Winter

For those of you that don't keep a clean interior year round I highly suggest giving your interior a really good cleaning before winter comes. Your car will be a mess after winter so the cleaner it is before the easier it will be to clean after. Also, I highly recommend some QUALITY rubber mats. The kind that won't let snow and salt onto your carpets.
Of course, this is not intended for you people who are lucky enough to never see snow. :p

Tuesday, September 22, 2009

We are now a dealer of Kraft / Tech Motorcycle Parts. So if there is anything you guys need from Kraft / Tech let me know.

You can see most of their parts here.

http://www.krafttechinc.com/

If you need anything just email us at orders@danase.com

Thursday, September 3, 2009

Cycle Source Magazine

I just picked up a copy of Cycle Source and it's a really good blue collar grass roots style magazine. I highly recommend it.

Sunday, August 30, 2009

So long Milwaukee Iron


http://www.milwaukeeiron.com/ I've always loved their bikes and just found out they are closing their doors. We wish you all the best in whatever the future brings.


Sons of Anarchy


Thursday, August 27, 2009

Harley to sell in India

Harley-Davidson to sell motorcycles in India

NEW YORK — Harley-Davidson Inc. said Thursday it will begin selling motorcycles next year in India, the world's second-largest motorcycle market, where the company hopes its iconic, heavyweight bikes will find a niche among the country's rising middle class.

The Milwaukee-based company said it has established a subsidiary near Delhi and has begun scouting the country for dealers.

"Given the rapid development of India's economy and physical infrastructure, this is exactly the right time to bring the world's greatest motorcycles to one of the world's largest motorcycling nations," said Mark Levatich, Harley's chief operating officer, in a statement.

India is the world's largest market for motorcycles behind China, but it is overwhelmingly dominated by smaller, inexpensive bikes used primarily for transportation, said Dilip Chenoy, director general of the Society of Indian Automobile Manufacturers.

Still, Harley said the country's growing economy, rising middle class and expanded highway construction has created a market for leisure motorcycle riders.

"Motorbikes, scooters in India are family commuting bikes," Chenoy said. "They tend to be more robustly built and the focus is on fuel economy, but there is an increasing market for leisure and high-end bikes which is beginning to happen here in India."

The move marks Harley's latest push into developing markets overseas, where it hopes rising incomes and the company's strong brand identity will spur sales and help offset flagging business at home.

International sales have made up a growing part of Harley's business. In 2008, motorcycle shipments in the U.S. fell 15 percent to 206,000 units while international shipments climbed 9 percent to 97,107.

Shares of Harley-Davidson closed Wednesday at $21.95. The stock has gained 29 percent since the start of the year, as investors begin to see a recovery in demand after a wrenching drop in sales during the U.S. recession.

Wednesday, August 26, 2009

Gloves

My gloves arrived yesterday evening and of course it's beenr aining all day today. Hopefully tomorrow I can try them out.

Wednesday, August 19, 2009

Olympia Gloves

I just ordered up a set of Olympia Gloves. I've never used them but they seem to get good reviews. I'll keep everyone posted. I ordered large which is the size I wear for my Joe Rocket gloves so hopefully these fit...like a glove. HAHAHAHA! Ok, I'll shut up. Here are the ones I got:

760 - AIR FORCE GEL

  • Washable synthetic leather palm offers great durability
  • Full Mesh back that allows maximum air flow while riding
  • Padded, nylon stretch knuckles & fingers for flex and protection
  • Gel padding for maximum comfort
  • Perforated neoprene cuff & strap keeps your wrist cool
  • Terry cloth sweat wipe on back of thumb
  • Reinforced nylon stitching
  • Adjustable Velcro strap

Sons of Anarchy Returns September 8th!

Sons of Anarchy Returns September 8th!
I can't freaking wait!

Tuesday, August 18, 2009

Dyna Beads

Just got back from a short ride. Nothing over 50 mph. The Dyna Beads seem to be doing the trick. No shaking or anything.

Monday, August 17, 2009

Kawasaki Drifter 800 Rear Fender For Sale - Complete!

I was planning on selling my rear fender this winter but figured I may as well post it up now in case someone is looking for one now.

It's the complete rear fender for a Drifter 800. Fender is OEM Kawasaki Pearl Black. The turn signals, brake light, wiring harness, chrome "bumper", is all included.

I'm asking $450 OBO for it all plus whatever shipping would be, unless you wanted to pick up Downriver. For shipping I will only ship this through UPS and will insure it for the full cost.


Rider Perception Test

Take the Rider Perception test from the Motorcycle Safety Foundation (MSF).
http://www.msf-usa.org/riderperception/

UPS

UPS is supposed to be delivering the Dyna Beads today! We shall see how well they work. I'm going to attempt to put them in my rear tire, with a 90 degree valve stem bend, while installed on the bike. I have a feeling this won't be fun with my huge Drifter fender, which is for sale by the way!.

I'll keep an update.

Wednesday, August 12, 2009

Dyna Beads to balance wheels

Well, I'm putting my bike back together this week. I took off the wheel weights to clean the wheels up nice and decided to give Dyna Beads a try. I've read a hundred post about them online and not one bad thing. http://www.innovativebalancing.com/motorcycle.htm
I'll keep you posted with my reviews once they arrive and I get them in.

Monday, August 10, 2009

Front fender

I took the front fender off and put the front tire back on without it. I think it looks pretty good. I'll probably run it this way the rest of the season and see how I like it. The bad part about the rear is that if I go with the bobber fender I'll either need new exhaust or need to cut the current ones. I totally did not think about it but the current exhaust is made to go to the rear of the fender. With the big fender gone the exhaust would stick out past the rear tire like 6"-8". We'll see how it looks on Thursday. I plan on getting the rear wheel back on then and see what it looks like without the fender.

Am I nuts?

I have a 2002 Vulcan Drifter 800. I love the bike. I love how it draws a ton of attention and everything. However, I have a love hate relationship with my fenders. you know, the huge Indian looking fenders. They look alright but they make checking the air pressure, cleaning the wheels and tires, checking the brakes, inspecting the chain and lubing the chain and huge pain in the rear. I LOVE bobbers so I'm thinking of ditching the fenders for smaller bobber style ones. I'm thinking of running no front fender for the rest of the season and if I like that then working this winter to get a bobber fender mounted in the rear along with mounting a new rear brake light, turn signals, and license plate holder. So far everyone has told me I was nuts and I should sell the Drifter and get a regular Vulcan to do that stuff to. The thing is, I have the Drifter, got it for a song, and put a lot of work into cleaning the bike up and getting it ready. I don't want to have to deal with selling and buying a new bike to work on. Anyway, I'm sure a lot of think I'm crazy for wanting to chop up a Drifter but I'm really thinking it'll look sweet when I'm done.

Saturday, August 8, 2009

Drifter fenders

I love my Vulcan Drifter 800 because there are not many on the road and it stands out amongst the other bikes. But, I'm starting to hate the fenders more and more. It makes it a paint to lube the chain, check the tire pressure, inflate the tires, clean the wheels and tires and so on. Right now my bike is sitting in the garage up on the stand with the wheels off. I REALLY liked the look of the bike without the rear fender. I'm thinking this would make a really sweet bobber bike.

Friday, August 7, 2009

Finally, new tires coming!

Well, this week I found a coupon for the Harbor Freight motorcycle jack and went and got it. It lifts the bike up fairly well too. This weekend I'm going to pull the wheels off, hopefully remembering to take pictures and do another writeup, and post a how-to article. Hopefully next week I'll be able to get the new tires thrown on at Honda East down in Toledo.

Thursday, August 6, 2009

Installing a jet kit on a Kawasaki Vulcan 800.

This process is what I had to do on my 2002 Kawasaki Vulcan Drifter 800. It should be the same for all 800 models from what I can tell. Also, some Harley Davidson bikes use this same carb, or a very similar one from the same manufacturer, so this should help the Harley crowd out as well.

I used a DynoJet jet kit part# 2186. I have a K&N filter and Hard - Krome pipes on the bike. For the most part, any jet kit you get will be done exactly like this.

Your first order of business is to remove the carb from the bike. Sorry I do not have a write up for that but it wasn't that hard.

With the carb off the bike take it to a work bench or table. There will be some springs and smaller parts so don't do it over grass or gravel or something silly where you'd lose a part if it fell to the ground. Or maybe stopping in the middle of your product to crawl around on the ground for an hour looking for a part the size of a needle is your thing?

Now, let the fun begin!

Needle Installation

The first step in removing the needle is to remove the black plastic cover, outlined in yellow in the image. It's held in by 4 phillips head screws. Be sure to use the correct size screwdriver on these. Mine were a little tight and I could see these being a possible disaster is you stripped them.


Once the cover is off here is what you'll see.


Remove the spring, shown above, and the vacuum piston, shown below. Inside the vacuum piston there will also be a needle and a plastic needle holder.


This is what you should be left with.


In this picture I've outlined in yellow, the needle, and needle holder. The vacuum piston is the item in the upper right corner of my work mat.


Next you'll take the new needle, spacers, and e-clip, included with the jet kit, and follow the instructions. The new needle will have several grooves cut into the top of it. For my application, it called for an e-clip in the #3 groove with 2 washers resting on top of it.

You can now reassemble the vacuum piston, needle, needle holder and cover. The installation is simply the opposite of removal.


Jet Installation

Now for the installation of the new jet.
First, turn the carb upside down and locate the 4 phillips head screws, circled in yellow below, holding the float bowl on. Remove the screws using the proper screw driver making sure not to strip them.


Once the screws are removed simply remove the float bowl. Below is what the carb will look like with the float bowl removed. I've circled the jet in yellow.

The old jet is easily removed using an open wrench and the new jet is simply screwed right back into the same threads the old one came out of. Some kits come with different size jets so be sure to read the instruction to determine what jet to use. The jet size should be stamped right on the jet.

Put the float bowl back on and secure it with the 4 screws and move onto the next item.


Pilot (Fuel Mixture) Screw Adjustment

The final step to the jet kit install is to adjust your pilot screw. If you skip this step you'll have a very poor running bike.

First, turn the carb upside down and locate the metal mixture screw cap ,circled in yellow in the next two pictures. Once the cap is located drill a hole in it (the jet kit comes with the drill bit). NOTE: STOP DRILLING THE SECOND IT GETS THROUGH THE CAP OR YOU'LL DAMAGE THE MIXTURE SCREW UNDER IT!


Next screw a screw (the jet kit came with a screw) into the hole, just enough to bite into the cap.
The yellow box in the picture below shows the screw in the hole.


Next, use a pair of pliers to grab onto the screw and pull. The cap should pop right off with ease.

Once the cap is off adjust the screw per your instructions.


Ta-da! Your new jet kit is in and all that is left to do is toss the carb back on and enjoy a smooth running bike!